Instrument Editor

Many moons ago, we used to trigger single samples by firelight using primitive MIDI-based tools; and for a time, it was good.
But drums are colorful instruments– just having one sample play back a little louder or quieter with varying velocities does them little justice.
Take a real snare drum, for example. If you hit a snare as hard as you can, it sizzles. There’s a high end that isn’t heard if you simply tap the snare lightly; a lightly tapped snare is much more muffled by comparison. As electronic music has developed, more and more artists have craved this nuanced and realistic texture in their electronic drums, to bring their drum tracks to life.
That’s why we have multi-sample instruments–so we can account for the wide variety of sounds a single instrument makes.
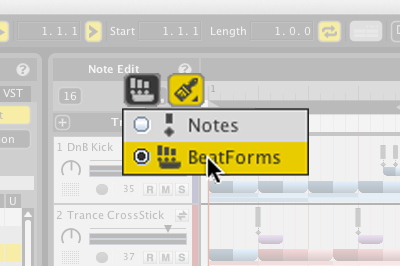
How to use the Instrument Editor in Liquid Rhythm to build custom multi-sample instruments:
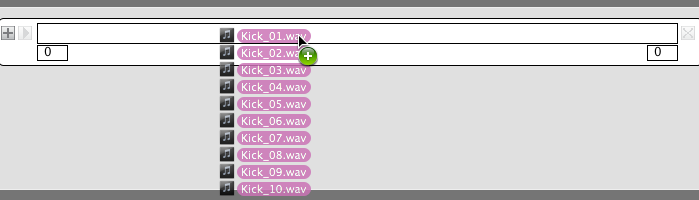
1. Drag the desired sample(s) onto the empty Articulation Slot at the bottom of the Instrument Editor.
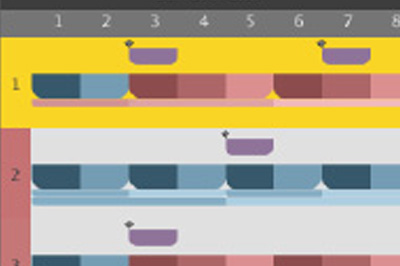
2. The Instrument Editor will automatically spread the voices evenly across the 127 available velocity values. In the example below, Kick_02.wav (the first row) will play when a velocity value between (and including) 13 and 25 is received.
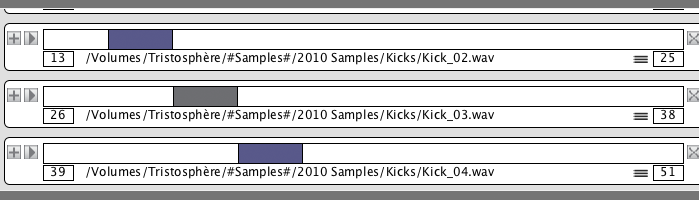
3. Click-and-drag the dividers in the Input Velocity Range bar to adjust the value each articulation responds to.
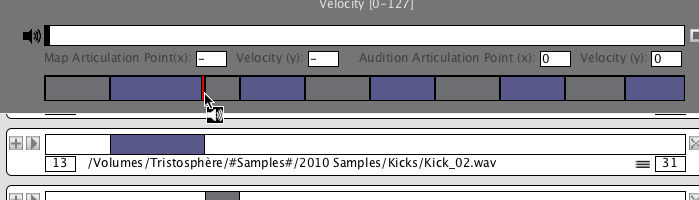
4. The Velocity Map maps MIDI input velocity to playback velocity for each sample. To use it, click-and-drag across the map. Note that you can hold [shift] to draw a straight line and right-click to select Reset Velocity Map from the drop-down menu.

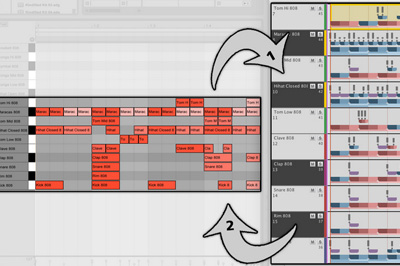
5. When you’ve defined articulation boundaries and playback velocities for all your samples, use the drum pad or piano roll at the top of the Instrument Editor to map your Instrument to a MIDI note; all you need to do is click the desired note or pad.
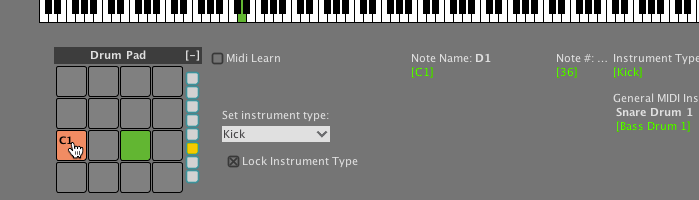
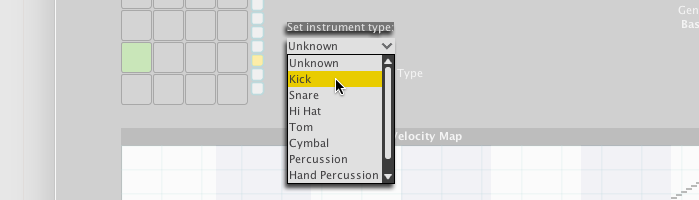
6. Also, use the Set Instrument Type drop-down menu to choose what kind of Instrument this is going to be, Kick, Snare, Hat, etc. This will help Liquid Rhythm’s pattern suggestion engine give you the best possible results when using the Beat Builder or BeatWeaver.
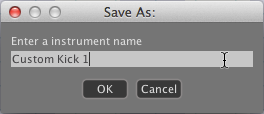
7. Last but not least, don’t forget to save your instrument. Click File > Save Instrument As… to open the Save dialogue box and save your instrument.
From now on, when you check the Instrument tab in the Library, your new Instrument will be there! Note that the category U will contain an X to indicate that it is a User sound.

Other Projects