How to use Liquid Rhythm as a VST with FL Studio 11:
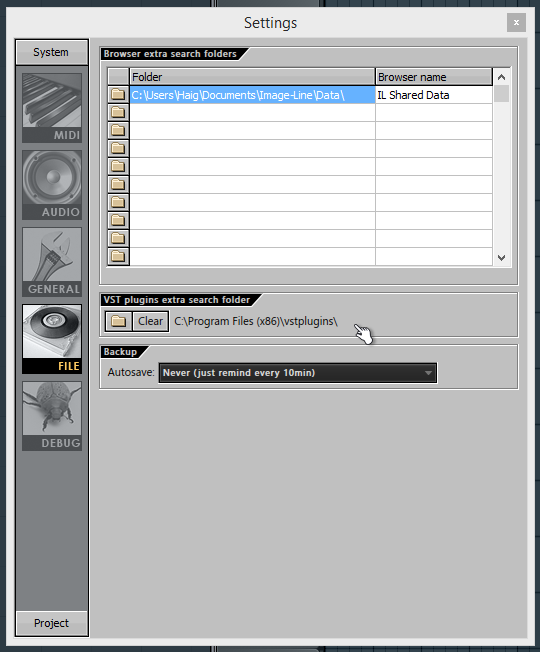
- First, make sure FL Studio is looking at the directory containing the Liquid Rhythm VST plugin. In FL Studio, go to Options > File Settings.
- Set VST plugins extra search folder to C:\Program Files (x86)\vstplugins\ (that is the default location of both the 32 and 64-bit versions of the Liquid Rhythm VST).
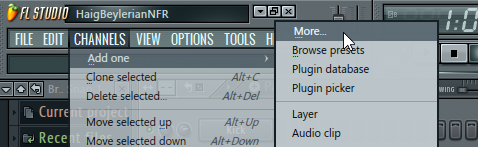
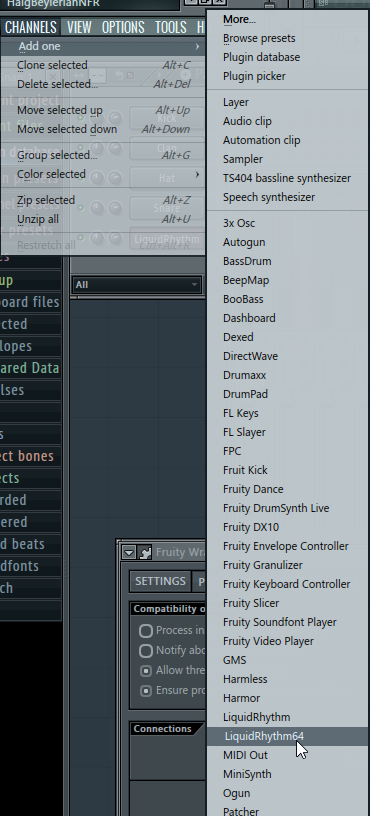
- Next, go to Channels > Add One > More…
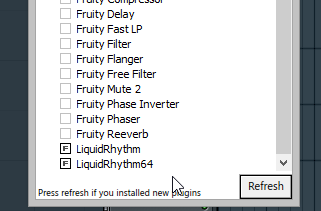
- In the Select Generator Plugin window that appears, select the checkboxes next to the Liquid Rhythm plugins and click the Refresh button at the bottom.
- Now, when you go to Channels > Add One you will see Liquid Rhythm in the list. Click it to launch.
How to use Liquid Rhythm’s multi-output mode with FL Studio 11:
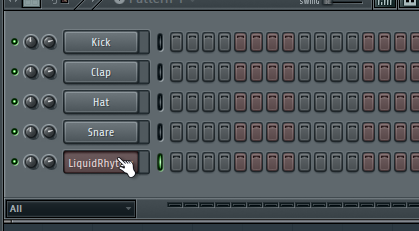
- After loading Liquid Rhythm following the steps above, click the button with Liquid Rhythm written on it in the Pattern Selector.
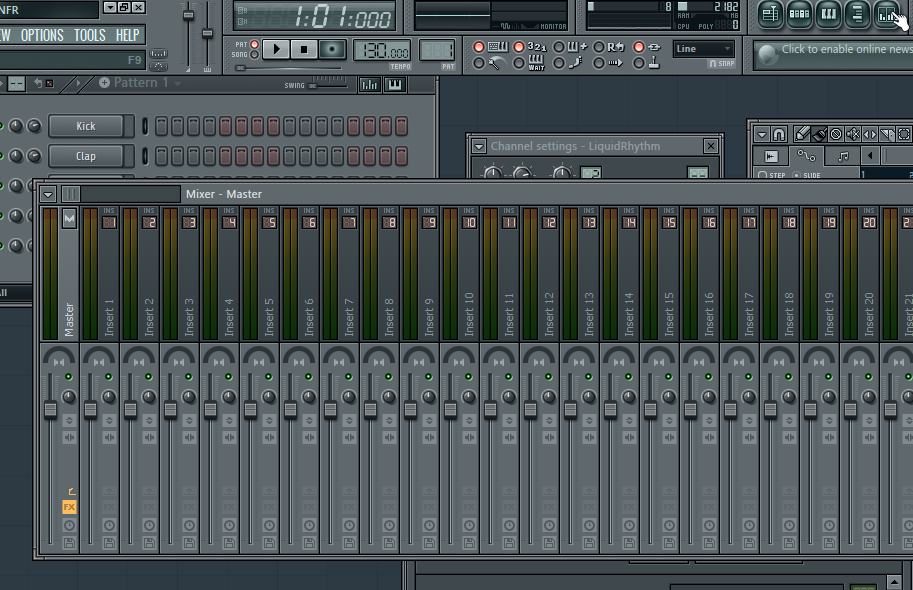
- Next, click FL’s mixer button (top right of this picture):
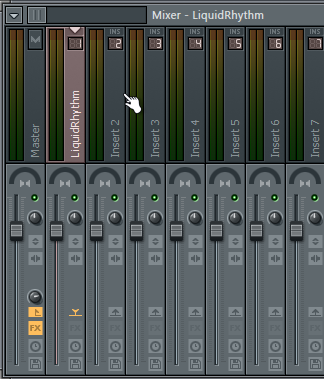
- Right-click Insert 1 and select Link Selected Channel > To This Track to assign a channel strip in FL to LR’s stereo output.
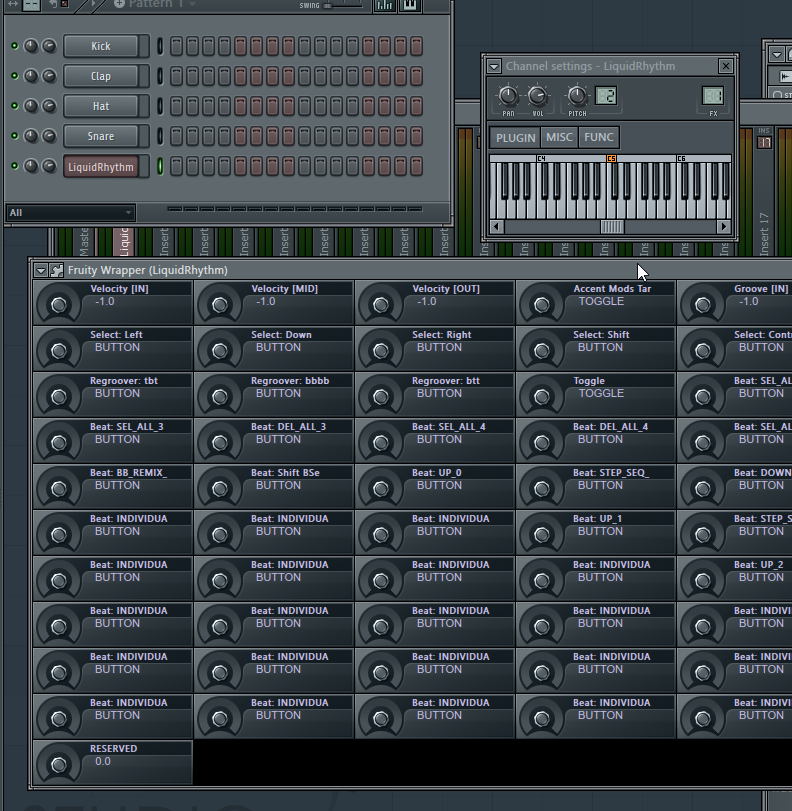
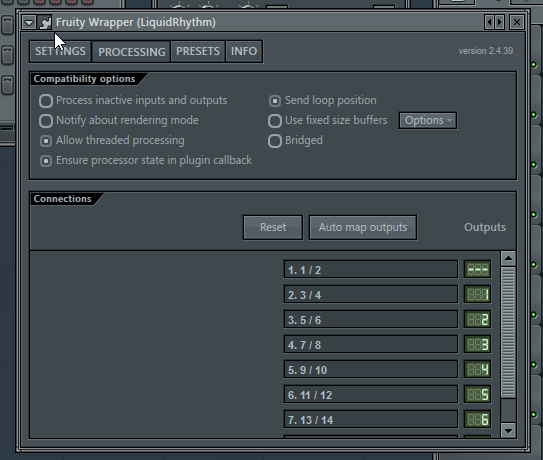
- Next, click the Plugin button in the Channel settings – LiquidRhythm window to reveal the Fruity Wrapper containing many of Liquid Rhythm’s mappable parameters. (You can make the Channel Settings window appear by clicking the Liquid Rhythm button you pressed in step 1).
- Click the gear on the top left of the Fruity Wrapper window to reveal more plugin options.
- Click the Auto map outputs button to send the rest of LR’s tracks to the adjacent inserts in FL (meaning Insert 2 will be outputting LR 3 – 4, Insert 3 will be outputting LR 5 – 6, etc).
- Next, [Alt]+[Tab] to Liquid Rhythm.
- Click the Loops tab in the Library panel and double-click a pattern to load it.
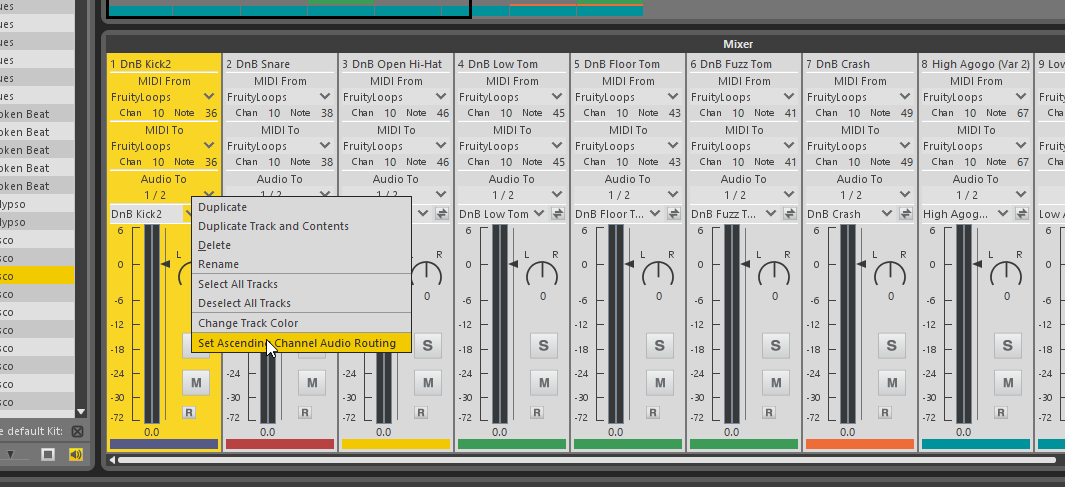
- Click the Mix button on the top right to show LR’s mixer.
- Right-click the first channel strip in the mixer and select Set Ascending Channel Audio Routing.
- That’s it. You can press play in FL to see it all in action: